Everyone says the shoulder is the easy choice. Low pain, good canvas, easy to show or cover. The assumption is that any design will land well there.
That assumption is why so many shoulder tattoos don’t look the way people pictured them.
The shoulder is not a flat surface. It curves. It has three distinct zones that behave differently under ink. A design that reads beautifully in a reference photo — centered, proportional, perfectly scaled — can hit the deltoid’s curve and suddenly look compressed, or sit on the shoulder blade and feel too small for the canvas. The shoulder is forgiving on pain and healing. It’s less forgiving on sizing and zone selection than most people expect.
The short answer on shoulder tattoo placement: the shoulder has three zones — the deltoid cap, the shoulder blade, and the outer shoulder into the upper arm — and each suits different design types. The right choice depends on your visibility preference, the design’s geometry, and your proportions. Getting that match right is what separates a shoulder tattoo that looks placed from one that looks perfect.
The Three Shoulder Zones and What Each One Does
The mistake most people make is treating “shoulder” as a single placement. It isn’t.
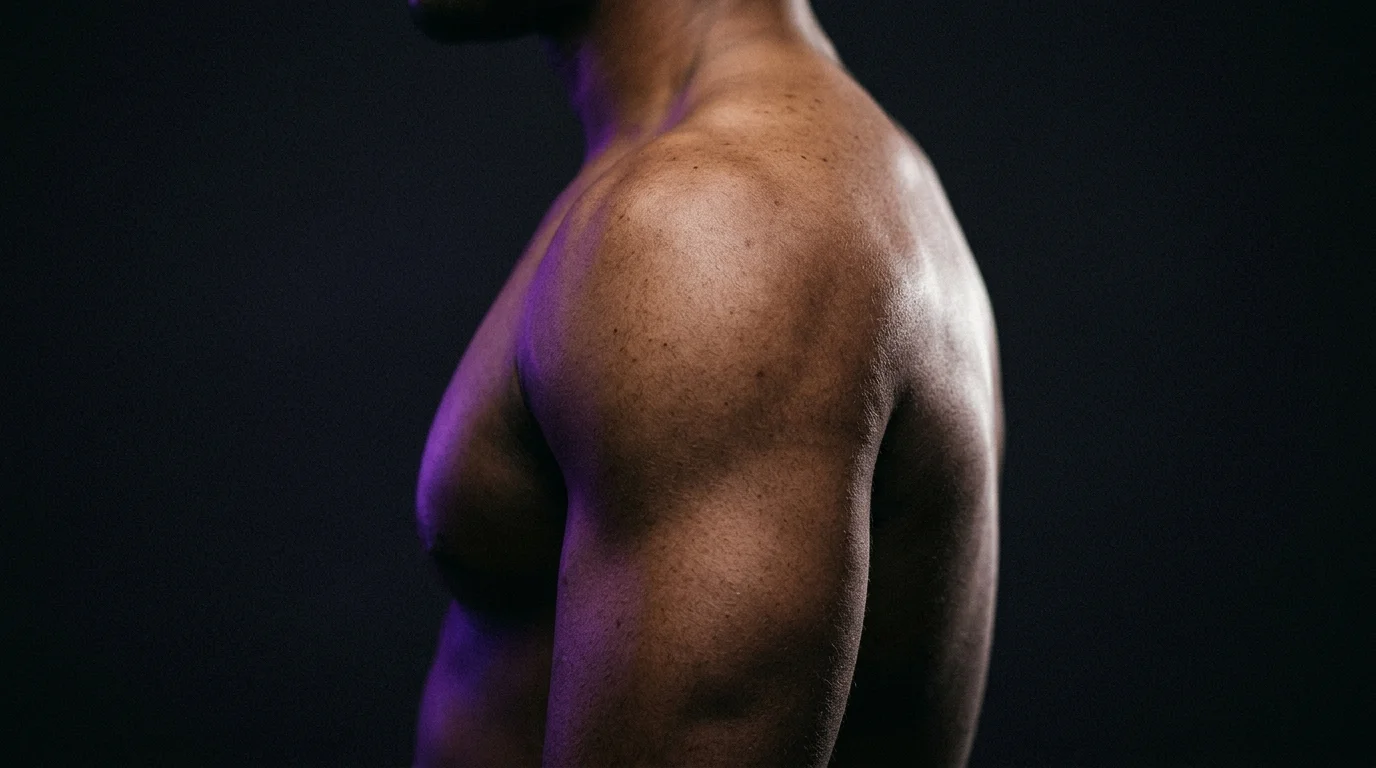
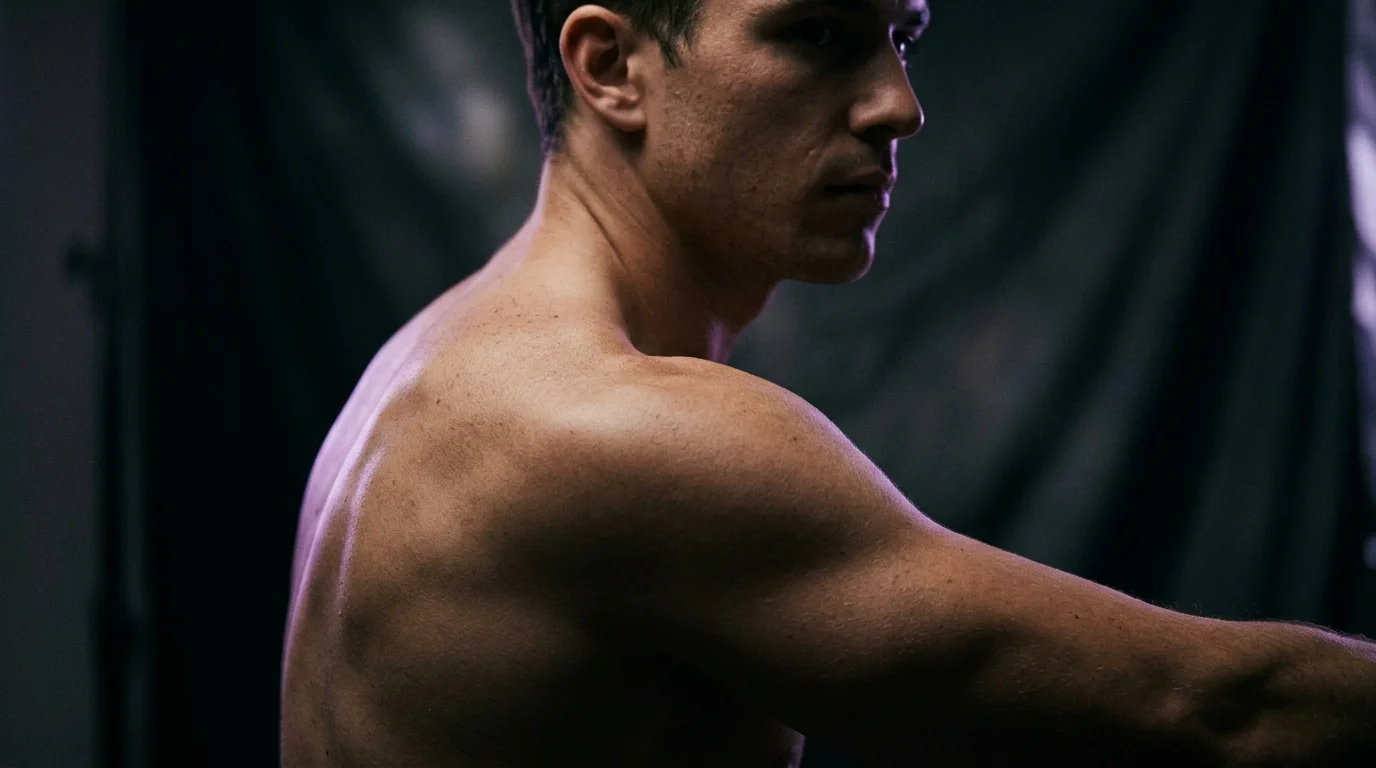
The deltoid cap — the rounded muscle mass that forms the top of the shoulder — is the most visible zone. It shows in a T-shirt, reads in a sleeveless top, and is visible when you look in the mirror without turning. Designs here need to account for the curve: the deltoid isn’t flat. A circular design becomes subtly oval when it wraps the cap. Horizontal elements can compress or elongate depending on the angle of the arm. Artists who work frequently on shoulders know to adjust for this — ask your artist how they’ll orient the design for the surface rather than assuming the flat reference transfers directly.
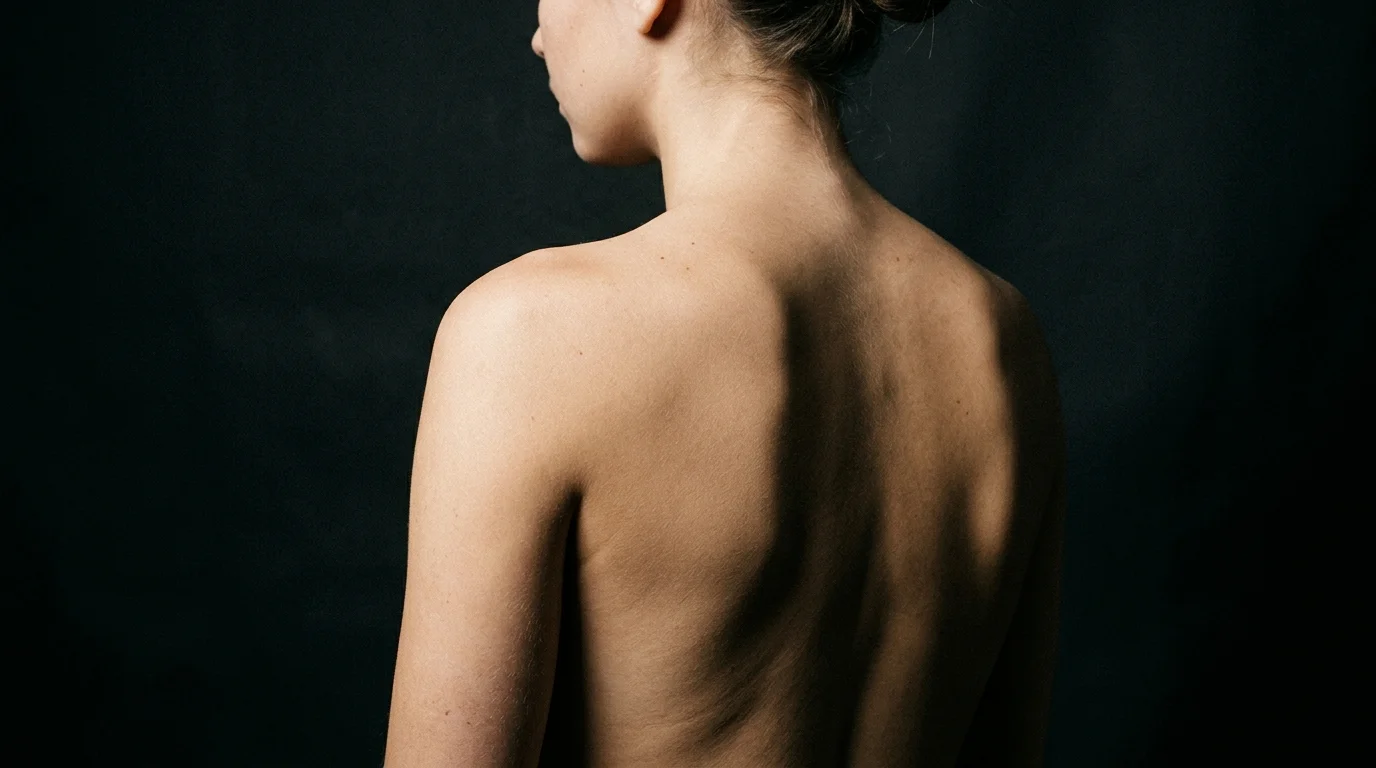
The shoulder blade area is a completely different canvas. Flat. Larger. Only visible when you actively reveal it — pulled-back hair, a backless top, a trip to the beach. This zone is where back pieces often anchor, where mandalas and geometric work read at full clarity, where larger botanical or illustrative designs have room to breathe. If your reference image has a lot of interior detail that needs to be seen up close, the shoulder blade gives you that space. The deltoid doesn’t.
The outer shoulder flowing into the upper arm is the transition zone — the geography that connects a shoulder piece to sleeve work, or stands alone as the natural join between shoulder and arm. Designs here often wrap slightly around the arm’s outer edge, which gives them a dimensional quality that flat-surface placements can’t replicate. This is also where cap-to-arm flow pieces start, where a design can suggest movement without being a full sleeve.
Sizing: The Shoulder Handles More Than People Expect
The most common sizing mistake on the shoulder is going too small.
A 3-inch piece on a deltoid disappears. The shoulder is a large, prominent surface — compact designs can look lost there, like a sticker applied to something much bigger. On the shoulder blade, this effect is even more pronounced. A 4-inch mandala that would dominate a forearm looks like a detail on a back piece.
The deltoid reads well with designs in the 4–6 inch range, depending on the complexity of the piece. The shoulder blade comfortably handles 6–10 inches for pieces with interior detail. If you’re choosing between two sizes and you’re genuinely unsure, the shoulder is one of the placements where sizing up is almost always right.
The exception is fine line work — delicate botanicals, single-line portraits, minimal geometric pieces. These can work at smaller scales on the shoulder because the style itself carries visual weight through linework rather than mass. The fine line tattoo aging considerations are worth reviewing here too: on the deltoid specifically, UV exposure in short sleeves means SPF discipline matters for fine line longevity more than on the shoulder blade.
Visibility: The Shoulder’s Real Selling Point
The shoulder is one of the few placements that gives you genuine control over who sees it and when.
Deltoid placement: visible in a T-shirt, visible at the gym, covered by most business attire. A sleeve reveals it immediately. A blazer or dress shirt covers it completely. This is the middle ground — present in casual life, invisible when you need it to be. Research consistently shows that tattoo visibility is the primary driver of placement regret — visible placements, particularly on the upper extremities, carry higher regret rates than protected or partially concealed ones. The shoulder avoids the highest-risk end of that spectrum.
Shoulder blade: true professional cover. Covered by any shirt, any blouse, any work attire without exception. The visibility question becomes entirely your choice — you show it, or you don’t. This is why the shoulder blade is one of the most popular placements for people who want significant work but aren’t ready to field workplace questions. As the hidden tattoo placement guide covers, the upper back and shoulder blade are naturally invisible under professional clothing without any special strategy.
The outer shoulder zone sits between these two — visible when the arm is uncovered, angled so it’s harder to see in a straight-on mirror check. This is part of why outer shoulder pieces can feel unexpectedly subtle even when the design is substantial.
How the Shoulder Ages
The shoulder is among the better long-term placements on the body. Here’s why.
The deltoid is supported by significant muscle mass. Skin over muscle holds ink differently than skin over bone — less distortion over time, less blurring from compression and movement at a joint. Elbows, knees, and wrists are notoriously hard on tattoos because of constant flexion; the shoulder, at its main surface, doesn’t have that problem.
Sun exposure is the main variable. The deltoid in short sleeves gets real cumulative UV, which matters for ink longevity. The AAD recommends broad-spectrum SPF 30+ applied consistently to tattooed skin that will see sun exposure — not just in the healing period, but as a long-term habit. That one behavior determines a significant share of how the deltoid holds over years.
The shoulder blade, being almost always under clothing, avoids most UV exposure entirely. Ink on the back shoulder tends to hold its depth and contrast longer than forearm or outer arm placements. This is part of why the shoulder blade is a smart location for pieces with fine interior detail — the clarity has a better chance of lasting.
The Proportion Problem Nobody Talks About
Here’s the thing about shoulder tattoos that reference photos can’t tell you: a design that looks right on someone else’s shoulder may not fit your proportions.
Shoulder width varies significantly between people. A bold geometric piece centered on a narrow deltoid can overwhelm the surface — the design and the canvas competing for attention. The same piece on a broader shoulder has room to breathe. A delicate piece on a wide shoulder can look like an afterthought.
This proportion mismatch is also what happens with wrap placement decisions: how far does the design extend down the arm? How does it land at the front and back edges of the shoulder? These questions are nearly impossible to answer from a reference image of someone else’s body.
YouGov’s research on tattoo acceptability by location found that arm tattoos are the most socially accepted placement among all options — 36% consider them always acceptable. The shoulder is the beginning of that real estate. But social acceptance doesn’t tell you whether the specific design you’ve chosen will scale correctly to your shoulder’s actual surface. That part requires seeing it at real scale on your body.
This is exactly where the “I’ll just know when I see it” approach breaks down. You can’t hold a printed reference to your own shoulder and get an accurate read — the angle is wrong, the scale is approximated, and the curve of the deltoid isn’t represented. You end up booking on faith.
Before you book, use TattThat to upload a photo of your shoulder — deltoid, shoulder blade, or outer arm, wherever you’re deciding — and place the design at actual scale. Drag it, resize it, rotate it. See whether it wraps the cap too tightly, whether it fits the blade with room to breathe, whether the proportions match your body rather than someone else’s reference photo. For a placement this dependent on individual anatomy, that confirmation step does something no amount of browsing reference images can.
For placement decisions beyond the shoulder — and how different zones compare for pain, visibility, and longevity — the full tattoo placement guide has the complete picture.
See It on Your Skin Before You Commit
Upload a photo, pick a design, and see exactly how it'll look — in seconds. 2 free previews, no card required.
Try TattThat Free →